
![]()
![]()


STINGRAY I / II
![]()
This is to all you Stingray mod freaks out there.
Since I started paintball about a year ago, the Stingray has interested
me. The simplicity in design and the use of softer building materials make
this a great project gun. I recently did multiple mods to my Stingray II
that may be useful to many many players.
I also must point
out that there are very few differences between the two versions of the
Stingray. This only being in the barrel and shroud assembly. The Stingray
I uses a larger bore in the upper receiver, a smaller barrel, and a barrel
shroud. The Stingray II uses a slightly larger diameter barrel and a smaller
diameter opening in the upper receiver, and uses no shroud. I have found
that an original Stingray I barrel can be used with the Stingray II if a
spacer is made. This can be done with pvc pipe, heat shrink tubing, ect.
You are only limited by your imagination!! :)
![]()
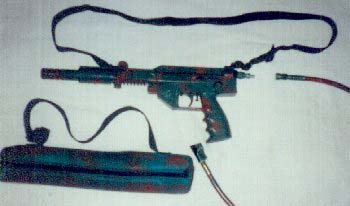
My Stingray II, external view with add-ons.
![]()
One of the first and easiest is a minor bolt mod. As many have probably noticed the ball detent ball bearing has a tendency to make a major ding on the bolt. My gun started breaking balls at 500 shots due to this problem. A lip about 1/16" had formed which was puncturing balls. By taking a file and filing in a groove (remove the o-ring first) that allows the bearing to 'ramp' cures this problem. After making the groove polish the bolt face with a dremel or other polishing tool.

Part to be filed out
![]()
I have always hated the cheap velocity regulators on the valve. Shutting off part of the flow after the valve is activated doesn't seem to be very efficient. I modified mine so a bolt adjusts the spring tension from the rear of the ray. This can be done two ways, both of which won't allow a bottle mount in the normal position (who would want it there anyhow?) By cutting the end plug piece from the donkey it can easily be drilled and threaded. The remaining piece can then be used for a remote or bottom line (if you can find a way to mount it). I went with the remote idea. I made a homemade remote using 3 ft of high pressure tubing and fittings.

I drilled (deeper) and
tapped both the donkey (where the old aluminum tube entered) and the valve body (also where the
old aluminum tube entered).
Basically replacing the tube with 3 ft of hose. It works great. The old adjustment
can be left all the way open so you should get full efficiency. Over all results show a widely
adjustable velocity range, and quieter operation due to the remote. In the end I spent
$21 for the hose, quick disconnect, and fittings. An on/off valve can also be easily added
and is going to be my next addition.
For anyone interested
I also installed governors so that trigger pull is limited in the forward and rear
position.
One screw on each underside of the trigger frame body for forward and one screw on each underside of the trigger frame body for rear. These screws are tapped into two metal strips that rest above the front and rear of the trigger (the same as the pins used at the web site I quoted above). The adjustable trigger range helps out with the sear mod in Sid's faq. As the sear is adjusted the trigger range can be changed to compensate. This allows the hair trigger feel to be tuned. My trigger pull was dropped to ~1/8".

![]()
Also, filling the grip with styrofoam in combination with the tank being on a remote was very effective in cutting down on the mechanical noise. My final opinion is simply wow!! The mods are very effective though I still hear plenty of comments, not all kind! But then again that is part of the joy of using the Stingray! :)
![]()
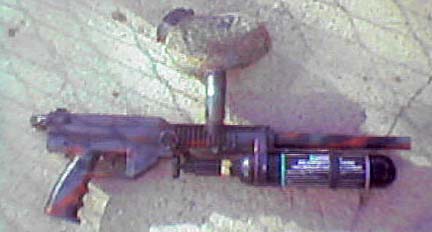
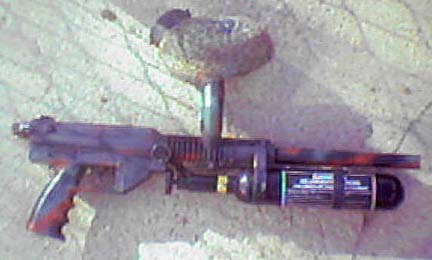
My current Stingray project.
![]()
Disclaimer:
If you use these mods and mess up your gun, or anything for that matter, it isyour responsibility! This is for your information only!! Enjoy!!!
![]()

 © Stingray Toters INternet Group